The Providence quilt block is a classic star design that comes together quickly and is perfect for confident beginners and seasoned quilters alike. Finishing at 10″, this block uses straightforward piecing to create a crisp, eye-catching star that looks beautiful in a wide range of color palettes.
Whether you choose a planned three-color scheme, a bold modern contrast, or a charming scrappy mix pulled from your stash, the Providence block adapts effortlessly to your style. In this tutorial, I’ll walk you step by step through cutting and construction so you can add this versatile star to your next quilt project with ease.
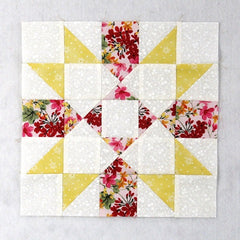
Fabric Requirements for a 10″ Finished Providence Quilt Block:
- Light/White: 2 – 3.5″ squares, 4 – 3″ squares, and 8 – 2.5″ squares
- Medium/Yellow: 4 – 3″ squares
- Dark/Pink: 2 – 3.5″ squares, and 4 – 2.5″ squares

Sewing Directions:
Half Square Triangle Units:
Step 1:
Using the 4 – Light/White 3″ squares and the 4 – Medium/Yellow 3″ squares, sew together 8 Half Square Triangle units as shown in the picture below. You can find my tutorial for making a basic Half Square Triangle block and how to square them up at https://quiltembroiderypdf.com/how-to-sew-a-basic-half-square-triangle-block Trim/square up the units to 2.5″.

Hourglass Units:
Step 2:
Piece together four Hourglass units (also known as quarter square triangles) using the 2 – Light/White 3.5″ squares and the 2 – Dark/Pink 3.5″ squares like the ones in the picture below. The tutorial for making a basic Hourglass block (includes squaring up) can be found at https://quiltembroiderypdf.com/how-to-sew-a-basic-hourglass-or-quarter-square-triangle-block Trim/square up the units to 2.5″ square.

Putting It All Together:
Step 3:
Lay out the Half Square Triangle units, the Hourglass units, the 3 – Light/White 2.5″ squares, and the 4 – Dark/Pink 2.5″ squares as shown in the picture below.


Step 4:
Sew all the patches into five rows like you see in the picture below.

Step 5:
Press the seam allowances away from the Half Square Triangle and Hourglass units as shown below.

Step 6:
All that’s left is to sew the rows together and…

Step 7:
Press the top and bottom seam allowances toward the center and press the middle two seam allowances away from the center as shown in the picture below. You’re done! Quick and easy!

Layout Ideas:


