The Sawtooth Patchwork quilt block is a timeless favorite that’s as versatile as it is beautiful. This 12″ block features a bold star at its center, framed with simple diamond shapes that create striking points and movement. Made with just half-square triangles and square-in-a-square units, it’s easy enough for a beginner while still offering plenty of room for creative fabric choices. This traditional block is a classic that shines on its own or as part of a larger quilt.
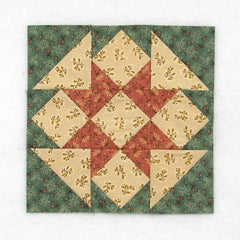
Fabric Requirements for a 12″ Finished Sawtooth Patchwork quilt block:
- Light/Tan: 2 – 5″ squares, and 5 – 4.5″ squares
- Dark/Rust: 12 – 2.5″ squares
- Dark/Green: 2 – 5″ squares, and 8 – 2.5″ squares

Sewing Directions:
Half Square Triangle Units:
Step 1:

Square in a Square Units:
Step 2:
Using a Light/Tan 4.5″ square, two Dark/Rust 2.5″ squares, and two Dark/Green 2.5″ squares “snowball” the corners of the Light/Tan 4.5″ square. I like to work on two opposite corners at a time. Click Square in a Square for a detailed tutorial on making this unit.
Here are the first steps:
- Mark a diagonal line from corner to corner on the back of the 2.5″ squares.
- Sew a Dark/Rust square and a Dark/Green square to the Light/Tan square along the marked line (top left image). Note the orientation of the marked line.
- Match the corners of the 2.5″ squares and press (top right image).
- Open up the 2.5″ squares and trim the seam allowances (bottom left image).
- Refold (bottom right image).

Step 3:

Step 4:

Step 5:

Putting It All Together:
Step 6:
Lay out the Half Square Triangle units, and the Square in a Square units as shown in the picture below. From here the block goes together like a basic Nine Patch block.

Step 7:
