This version of the Braced Star quilt block is quick and easy to create and uses only a light, medium and dark colored fabric. It’s construction is based off of the basic Eight Point Star block (also known as the Ohio Star although I use that name for a different block – so confusing!). Anyway, let’s get sewing!
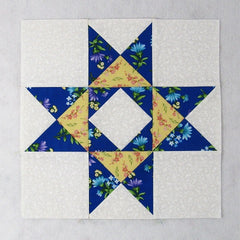
Fabric Requirements for a 12″ Finished Braced Star Variation Quilt Block:
- Light/White: 1 – 5.5″ square and 5 – 4.5″ squares
- Medium/Yellow: 1 – 5.5″ square
- Dark/Blue: 2 – 5.5″ squares and 4 – 2.5″ squares

Sewing Directions:
Square in a Square Unit:
Step 1:
Using one of the Light/White 4.5″ squares and the four Dark/Blue 2.5″ squares sew together a Square in a Square unit for the center of the block. You can find my tutorial for making a basic Square in a Square block at https://quiltembroiderypdf.com/how-to-sew-a-basic-square-in-a-square-block

Hourglass Units:
Step 2:
Next you will make four 3-color Hourglass units using the Light/White, Medium/Yellow and Dark/Blue 5.5″ squares. Trim/square up the units to 4.5″ square. You can find the tutorial for sewing together a basic Hourglass (and a 3-color one) at https://quiltembroiderypdf.com/how-to-sew-a-basic-hourglass-or-quarter-square-triangle-block
Here’s a picture of the first step.

And a picture of the completed units all trimmed/squared up to 4.5″ square.

Putting It All Together:
Step 3:
Now you can lay out the Square in a Square unit, the Hourglass units, and the four remaining Light/White 4.5″ squares as shown in the picture below.

Step 4:
From here this variation of the Braced Star block goes together just like a basic Nine Patch block. Sew the units into three rows as shown below.

Step 5:
And press the seam allowances away from the Hourglass units as shown in the picture below.

Step 6:
Then sew the rows together as shown below.

Step 7:
And press the seam allowances. As you can see from the picture, I’ve pressed mine away from the center of the block but you can press whichever direction you prefer. You’re done! I told you it was quick!

Layout Ideas:


