Today let’s look at the Kaleidoscope quilt block designed by Nancy Page. This block is not at all like the more modern blocks by the same name. It’s a large pretty block that makes a secondary star pattern when multiple blocks are sewn together.
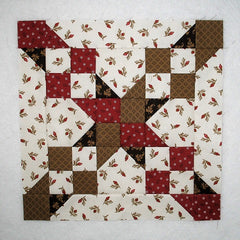
Nancy Page was the name that was used by Florence La Ganke Harris for her quilt pattern column that was published in many newspapers from 1927 through 1943-44.
Fabric Requirements for a 16″ Finished Kaleidoscope Quilt Block:
- Light/Cream: 4 – 2.5″ x 12.5″ rectangles, 4 – 4.5″ squares, and 8 – 2.5″ squares
- Medium/Red: 12 – 2.5″ squares
- Medium/Brown: 12 – 2.5″ squares
- Dark/Black: 8 – 2.5″ squares

Sewing Directions:
Four Patch Units:
Step 1:
Using eight Light/Cream 2.5″ squares, six Medium/Red 2.5″ squares, and six Medium/Brown 2.5″ squares, sew together five Four Patch units like those in the picture below. Two of the units will be Cream/Red, one will be Red/Brown, and two will be Cream/Brown.
You can find my tutorial for making a basic Four Patch block at https://quiltembroiderypdf.com/how-to-sew-a-basic-four-patch-quilt-block.

Half Square in a Square Units:
Step 2:
Now you will need to make four units of what I’m calling a Half Square in a Square as shown in the picture below. You will need two Brown/Black units and two Red/Black units
You can find my tutorial for a basic Square in a Square block at https://quiltembroiderypdf.com/how-to-sew-a-basic-square-in-a-square-block.

Rectangle Units:
Step 3:
Using the four Light/Cream 2.5″ x 12.5″ rectangles, four Dark/Black 2.5″ squares, two Medium/Red 2.5″ squares, and two Medium/Brown 2.5″ squares sew together four Rectangle units. These units are basically elongated Flying Geese units. You will need two Black/Red units and two Black/Brown units.
You will find my no-trim method for making a Flying Geese block at https://quiltembroiderypdf.com/how-to-sew-a-basic-flying-geese-block

Center Unit:
Step 4:
Lay out the Four Patch units and the Half Square in a Square units as shown in the picture below. This Center unit goes together like a basic Nine Patch block.

Step 5:
Sew the units into three rows.

Step 6:
Press the seam allowances away from the Half Square in a Square units as shown below.

Step 7:
Sew the rows together. This is a pretty 12″ block all by itself!

Press seam allowances toward the center of the unit as shown.

Putting It All Together:
Step 8:
Lay out the Center unit, the Rectangle units, two Medium/Red 2.5″ squares, and two Medium/Brown 2.5″ squares as shown in the picture below.

Step 9:
Once again you will sew the units into three rows.

Step 10:
Press the seam allowances toward the Rectangle units as shown.

Step 11:
Finally, sew the three rows together to complete the block.

Step 12:
And press the seam allowances away from the center of the block. Done!

Layout Options:
Here is your basic 4 x 4 layout. Notice how you get another star at the block intersections.

Here is the same layout as above but with sashing and cornerstones.

Of course, you can always do a scrappy layout. I made the Dark fabric the same throughout all the blocks as well as the background.

In this example I used an alternating chain block.

Here’s an on-point layout:
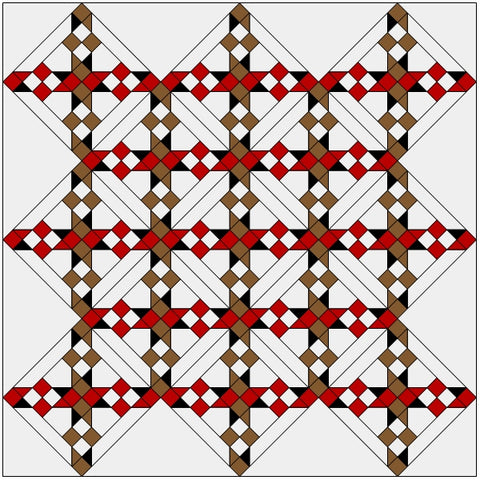
And another on-point layout with dark sashing. I think this is my favorite!
