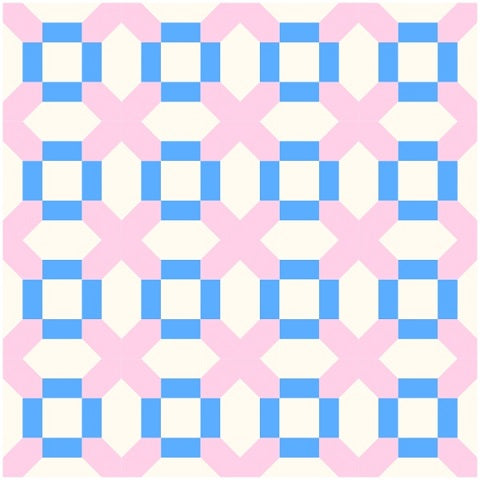
The Linoleum quilt block is so easy, you’ll have a quilt made in a flash! And it creates a wonderful secondary design! The block is made with just squares, rectangles, and a modified Square in a Square patch. Let’s get sewing!
I can imagine that some lady looked at her floor and thought “I can make a quilt with that design”. Inspiration can come from so many places if we just take the time to look!
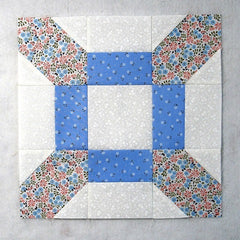
Fabric Requirements for a 12″ Finished Linoleum Quilt Block:
- Light/White: 1 – 4.5″ square, 4 – 2.5″ x 4.5″ rectangles, and 8 – 2.5″ squares
- Medium/Pink: 4 – 4.5″ squares
- Dark/Blue: 4 – 2.5″ x 4.5″ rectangles

Sewing Directions:
Corner Unit:
Step 1:
This unit is half of a Square in a Square block (you can find the tutorial for that block at https://quiltembroiderypdf.com/how-to-sew-a-basic-square-in-a-square-block. I’ve combined the steps into the picture below.
- First you mark a diagonal line from corner to corner on the back of the Light/White 2.5″ squares.
- Place two of the 2.5″ squares on opposite corners of a Medium/Pink 4.5″ square and sew on the marked line.
- Fold the Light/White square along the sewn line, match up the corners, and press.
- Trim away the excess seam allowance fabric and refold the Light/White fabric to complete the unit.

Step 2:
Repeat Step 1 for a total of four Corner units as shown in the picture below.

Rectangles Unit:
Step 3:
Sew a Dark/Blue 2.5″ x 4.5″ rectangle and a Light/White 2.5″ x 4.5″ rectangle together and press the seam allowance toward the Dark/Blue fabric as shown below.

Step 4:
Repeat Step 3 for a total of four Rectangles units like you see in the picture below.

Putting It All Together:
Step 5:
Lay out the Corner units, Rectangles units, and Light/White 4.5″ square as shown in the picture below. From here the block goes together just like a Nine Patch block.

Step 6:
Sew the units into three rows as shown below.

Step 7:
Press the seam allowances toward the Rectangles units as shown in the picture below.

Step 8:
All that’s left is to sew the three rows together and…

Step 9:
Press the seam allowances away from the center of the block. Easy Peasy!

Layout Ideas:
Here’s the basic 4 x 4 layout that shows the “X” design that appears when multiple blocks are sewn together.