Today let’s sew together a Picket Fence quilt block. This beginner-friendly block is really quick to create and can be arranged a number of ways for different looking quilts! There are also several other blocks that go by the same name – just to make it confusing. Let’s get started!
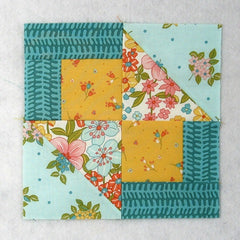
Fabric Requirements for a 9″ Finished Picket Fence Quilt Block:
- Light Print: 1 – 5.5″ square
- Light Aqua Print: 1 – 5.5″ square
- Yellow: 2 – 3.5″ squares
- Aqua: 2 – 2″ x 3.5″ rectangles, and 2 – 2″ x 5″ rectangles

Sewing Directions:
Half Square Triangle Units:
Step 1:
Using the Light Print 5.5″ square and the Light Aqua 5.5″ square, sew together two Half Square Triangle units as shown in the picture below. Trim/square up the units to 5″. You can find my tutorial for making half square triangles at https://quiltembroiderypdf.com/how-to-sew-a-basic-half-square-triangle-block

Other Units (for lack of a better name!):
Step 2:
Sew an Aqua 2″ x 3.5″ rectangle to one side of a Yellow 3.5″ square as shown in the picture below. Press the seam allowance toward the Aqua fabric.

Step 3:
Now you can sew an Aqua 2″ x 5″ rectangle to an adjacent side of the Step 2 unit and press the seam allowance toward the Aqua fabric as shown below. Repeat Steps 2 and 3 for a total of two units.

Putting It All Together:
Step 4:
Lay out the Half Square Triangle units and the Other units as shown in the picture below.

Step 5:
From here the Picket Fence block goes together like a basic Four Patch block. First, you sew the units into two rows.

Step 6:
Then press the seam allowances toward the Half Square Triangle units as shown below.

Step 7:
All that’s left is to sew the two rows together and…

Step 8:
Press seam allowances. You can see that I’ve used the tweak/twirl/furl method for pressing the seam allowance but you can press however you prefer.

Layout Options:
This example is the basic 4 x 4 layout with colors similar to the tutorial.

In this option, I’ve rotated every other block and a nice star and cross design appears.


Then I put the block on point and got a totally different look. I used a light complimentary blue fabric for the setting triangles.
