The Hay’s Corner uses simple blocks to create a more complex design. Easy, beginner friendly and quick to sew together. Let’s get started!
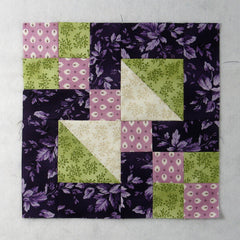
I thought that the name of this block must have some significance. So I googled it and came up with the town of Hay’s Corner in Ohio. I can just imagine someone designing this block and naming it after their home town. But who knows where the name came from!
Fabric Requirements for a 12″ Finished Hay’s Corner Quilt Block:
- Light/Ivory: 1 – 5″ square
- Medium/Green: 1 – 5″ square, 4 – 2.5″ squares
- Medium/Purple: 4 – 2.5″ squares
- Dark/Purple: 2 – 2.5″ x 6.5″ rectangles, 6 – 2.5″ x 4.5″ rectangles

Sewing Directions:
Half Square Triangle Units:
Step 1:
Using the Light/Ivory 5″ square and the Medium/Green 5″ square, sew together two Half Square Triangle units like the ones in the picture below. You can find a tutorial for making a basic Half Square Triangle block at https://quiltembroiderypdf.com/how-to-sew-a-basic-half-square-triangle-block.

Four Patch Units:
Step 2:
Next you’ll sew two Four Patch units using the Medium/Green 2.5″ squares and the Medium/Purple 2.5″ squares as shown in the picture below. You can see in the picture that I used the tweak/twirl/furl method for pressing the seam allowances. This helps the unit lay flatter. You will find my tutorial for sewing a basic Four Patch at https://quiltembroiderypdf.com/how-to-sew-a-basic-four-patch-quilt-block

Half Square Corner Unit:
Step 3:
Lay out one Step 1 Half Square Triangle unit with one Dark/Purple 2.5″ x 6.5″ rectangle and one Dark/Purple 2.5″ x 4.5″ rectangle as shown below.

Step 4:
Sew the Dark/Purple 2.5″ x 4.5″ rectangle to the Half Square Triangle unit as shown. Press the seam allowance toward the Dark/Purple fabric.

Step 5:
To complete the unit, sew the Dark/Purple 2.5″ x 6.5″ rectangle to the Step 4 unit and press the seam allowance toward the Dark/Purple fabric. Repeat Steps 3 through 5 for a total of two units.

Four Patch Corner Units:
Step 6:
Lay out a Four Patch unit, a Medium/Purple 2.5″ square, and two Dark/Purple 2.5″ x 4.5″ rectangles as shown in the picture below.

Step 7:
This unit goes together like a uneven Four Patch. First sew the patches into two rows and press the seam allowances toward the Dark/Purple fabric as shown below.

Step 8:
Then sew the two rows together and press the seam allowance away from the Four Patch unit as shown. Repeat Steps 6 through 8 for a total of two Four Patch Corner units.

Putting It All Together:
Step 9:
Now you can sew the units together like a basic Four Patch. Lay out the Half Square Corner and Four Patch Corner units as shown in the picture below.

Step 10:
Sew the units into two rows as shown in the picture below, and…

Press the seam allowances toward the Four Patch Corner units as shown below.

Step 11:
All that’s left is to sew the two rows together.
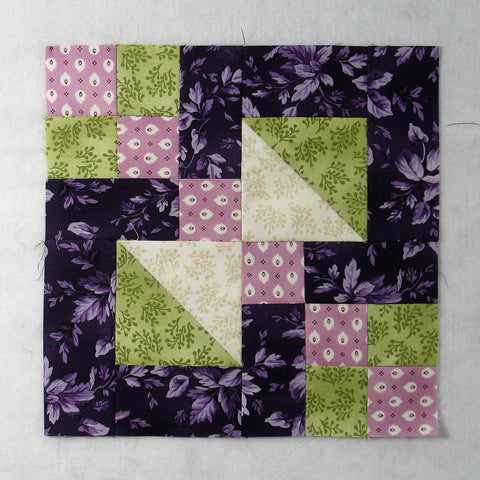
And press the seam allowance. Once again, I’ve used the tweak/twirl/furl method for pressing the seam allowance. All done!

Layout Options:
I put a few layouts together to give you an idea of what this block can look like in a quilt.
Here is an example with multiple blocks laid out in the same orientation.

In this layout, every other block is rotated 90 degrees. I think this is more interesting visually than the first example.

Here’s the same layout only sashing and cornerstones have been added. If I squint, it kind of looks like big flowers. I think this is my favorite.

Finally, here’s an example with a simple alternating block to make that chain design more prominent.
