This easy block uses just squares and rectangles to create a design that alternates light and dark fabrics for a delightful quilt. While the units can be made like a typical Nine Patch block, I’ve chosen to eliminate some seams by using rectangles in place of some of the squares. Let’s get started!
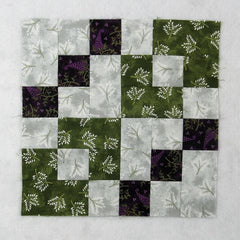
Fabric Requirements for a 12″ Finished Nine Patch Variation Quilt Block:
- Light/Gray: 4 – 2.5″ x 4.5″ rectangles, and 10 – 2.5″ squares
- Dark/Green: 4 – 2.5″ x 4.5″ rectangles, and 4 – 2.5″ squares
- Dark/Purple: 6 – 2.5″ squares

Sewing Directions:
Purple/Gray Units:
Step 1:
Sew two Light/Gray 2.5″ squares to opposite sides of a Dark/Purple 2.5″ square. Press the seam allowances toward the Dark/Purple fabric as shown in the picture below.
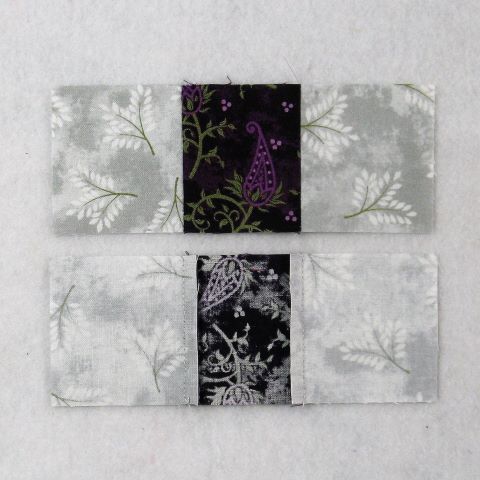
Repeat for a total of 2 units as shown below.

Step 2:
Sew a Dark/Purple 2.5″ square to one end of a Light/Gray 2.5″ x 4.5″ rectangle. Press the seam allowance toward the Dark/Purple fabric as shown below.

Repeat for a total of four units as shown.

Step 3:
Lay out one Step 1 unit and two Step 2 units as shown in the picture below.
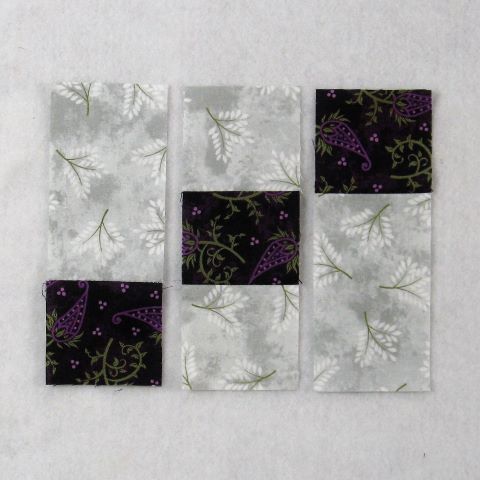
Sew the three units together and…

Press the seam allowances away from the middle of the unit as shown below. Repeat for a total of two Purple/Gray units.

Green/Gray Units:
Step 4:
We’re going to be making the same unit only the dark and light fabrics are reversed and I’ve substituted green for the purple fabric. And the pressing directions change a bit too.
Sew two Dark/Green 2.5″ squares to opposite sides of a Light/Gray 2.5″ square. Press the seam allowances toward the Dark/Green fabric as shown in the picture below.

Repeat for a total of two units.

Step 5:
Sew a Light/Gray 2.5″ square to one end of a Dark/Green 2.5″ x 4.5″ rectangle. Press the seam allowance toward the Dark/Green fabric as shown below.
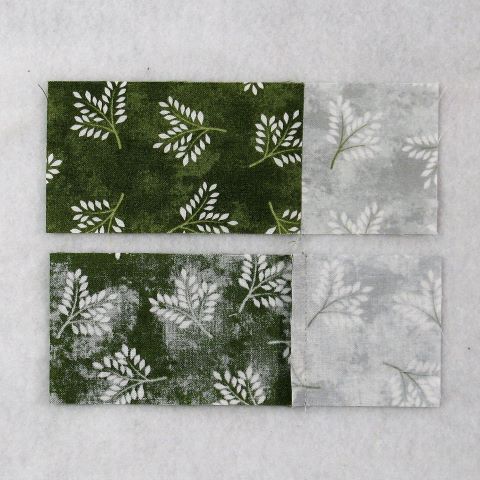
Repeat for a total of four units like the ones in the picture below.

Step 6:
Lay out one Step 4 unit and two Step 5 units as shown.

Sew the three units together and…

Press the seam allowances toward the center of the unit as shown in the picture below. Repeat for a total of two Green/Gray units.

Putting It All Together:
Step 7:
Lay out the Purple/Gray units and the Green/Gray units as shown below. From here the block goes together like a basic Four Patch block.

Step 8:
Sew the units into two rows.

Press the seam allowances toward the Purple/Gray units as shown below.

Step 9:
Sew the two rows together to complete the block and…

Press the seam allowance. You can see in the picture below that I’ve pressed using the tweak/twirl/furl method but you can press however you wish.

Layout Ideas:
Here’s just the typical 4 x 4 layout. I like the diagonal lines it creates!
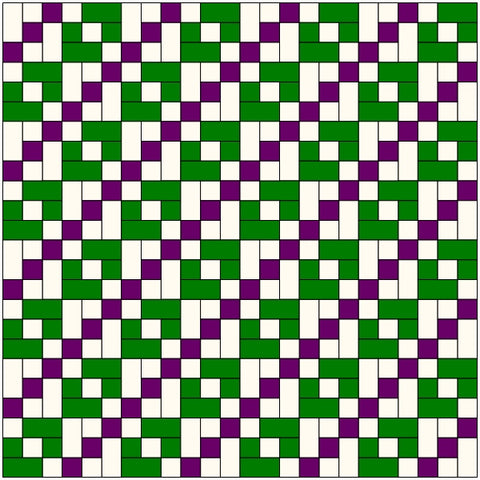
Here’s the same layout except that in every block a different color is substituted for the green and the purple squares are replaced with black. So this is a scrappy layout. I think it would be a cute kid’s quilt.

This example shows what happens when every other block is rotated 90 degrees.

Here’s the same layout only with sashing and cornerstones added.

In this example the blocks are rotated so that a diamond pattern appears in the middle and radiates outward.

And here’s an on point layout.
