This easy Windmill block is made entirely of Half Square Triangles and squares – super quick! Plus it creates secondary windmills when sewn in a quilt. It reminds me of those big blades on wind turbines that we see popping up all over the country. There are some layout ideas toward the end of the tutorial so you can see what this Windmill block looks like in a quilt.
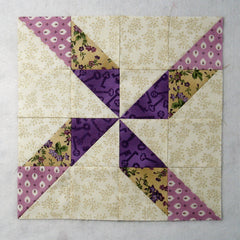
There are several other blocks that go by the same name – just to keep things interesting!
Fabric Requirements for a 12″ Finished Windmill Quilt Block:
- Light/Ivory: 6 – 4″ squares, and 4 – 3.5″ squares
- Medium/Purple: 2 – 4″ squares
- Medium/Tan: 2 – 4″ squares
- Dark/Purple: 2 – 4″ squares

Sewing Directions:
Half Square Triangle Units:
Step 1:
Using the six Light/Ivory 4″ squares and the Medium and Dark 4″ squares, sew together 12 Half Square Triangle units as shown in the picture below. Trim/square up the HSTs to 3.5″. You can find my tutorial for making a basic Half Square Triangle block at https://quiltembroiderypdf.com/how-to-sew-a-basic-half-square-triangle-block

Putting It All Together:
Step 2:
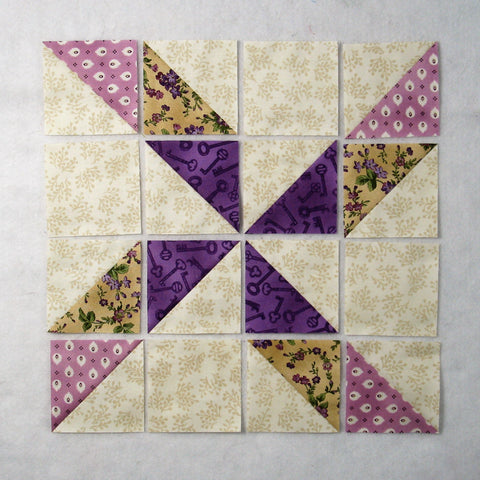
Lay out the Step 1 Half Square Triangle units and the four Light/Ivory 3.5″ squares as shown in the picture below.
Step 3:
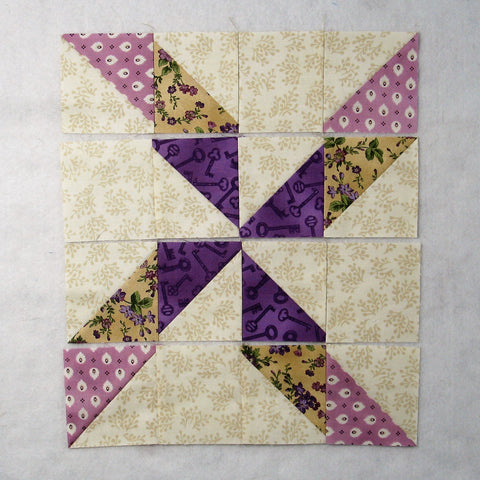
Sew the patches into four rows as shown below.
Step 4:
Now you need to press the seam allowances. Notice that I have pressed rows 1 and 3 to the right and rows 2 and 4 to the left. This will help your points to meet up nicely and the block will lay flatter.

Step 5:
All that’s left is to sew the four rows together as shown below.

Step 6:
And press the seam allowances as shown below. Notice that I tweaked/twirled/furled the middle intersections of each seam allowance. This makes for a flatter block.
