Today let’s take a look at the Grandmother’s Own quilt block. This traditional quilt block is fairly easy – if you can do Flying Geese, you’re good to go! There are several ways you could construct this block but I picked the one that has the fewest seams. Let’s get started!
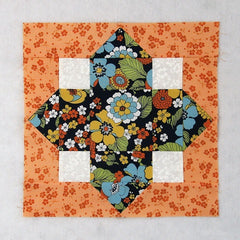

Fabric Requirements for a 12″ Finished Grandmother’s Own Quilt Block:
- Light/White: 4 – 2.5″ squares
- Medium/Orange: 4 – 2.5″ x 6.5″ rectangles, and 4 – 2.5″ x 4.5″ rectangles
- Dark/Navy: 1 – 4.5″ square, and 8 – 2.5″ x 4.5″ rectangles

Sewing Directions:
Center Unit:
Step 1:
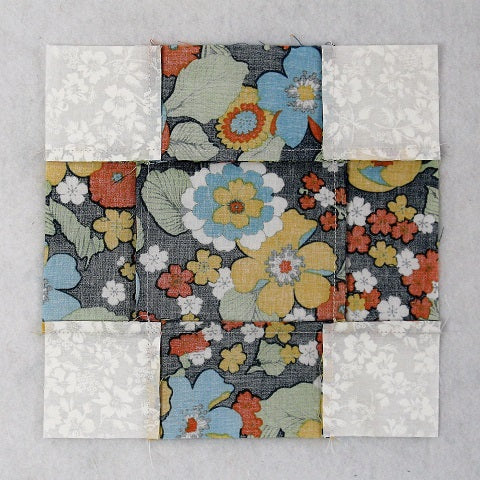
Lay out the Light/White 2.5″ squares, the Dark/Navy 4.5″ square, and four of the Dark/Navy 2.5″ x 4.5″ rectangles as shown in the picture below.

Step 2:
Now you can sew the patches together just like an uneven Nine Patch block. First sew the patches together in three rows as shown below.

Step 3:
Press the seam allowances away from the Light/White fabric in the top and bottom rows, and away from the Dark/Navy 4.5″ square in the middle row as you can see in the picture below.

Step 4:
Now sew the three rows together and…

Step 5:
Press the seam allowances toward the center of the unit as shown in the picture below.
Modified Flying Geese Units:
Step 6:
Mark a line at a 45 degree angle on one end of the Medium/Orange rectangles as shown below. Please note the direction of the line – half start in the upper left corner and half start in the lower left corner.

Step 7:
Basically you are going to make a Flying Geese block but use longer patches. Match up one of the Medium/Orange 2.5″ x 4.5″ rectangles with one Dark/Navy 2.5″ x 4.5″ rectangles as shown below. Note the direction of the marked line on the Medium/Orange rectangle. Sew on the marked line (or slightly inside the line). Fold and press on the marked line as shown in the bottom example.

Step 8:
Now you can unfold the Medium/Orange rectangle and trim off the seam allowance as shown in the top example in the picture below. Then refold the Medium/Orange rectangle as shown in the bottom example. Half done!

Step 9:
Repeat Step 7 on the other end of the Step 8 unit. Repeat Steps 7 through 9 for a total of 2 units.

Step 10:
Using the Medium/Orange 2.5″ x 6.5″ rectangles in place of the smaller Medium/Orange rectangles, repeat Steps 7 through 9 to make 2 longer Modified Flying Geese units as shown below.

Putting It All Together:
Step 11:
Lay out the Center unit, and the two Step 9 units (the shorter ones) as shown below.

Step 12:
Sew the units together as shown in the picture below. My points didn’t match up perfectly but really close – good enough for me. You probably can’t even tell in the photo.

Step 13:
Press the seam allowances toward the center as shown below.

Step 14:
Sew the Step 10 units to the top and bottom of the Step 13 unit you just completed. (I forgot to take a lay out picture.) All done except for the pressing!

Step 15:
Press the seam allowances. You can see in the picture below that I pressed toward the outside of the block but I think it lays a little better if it’s pressed toward the center. Your choice!

Layout Ideas:


