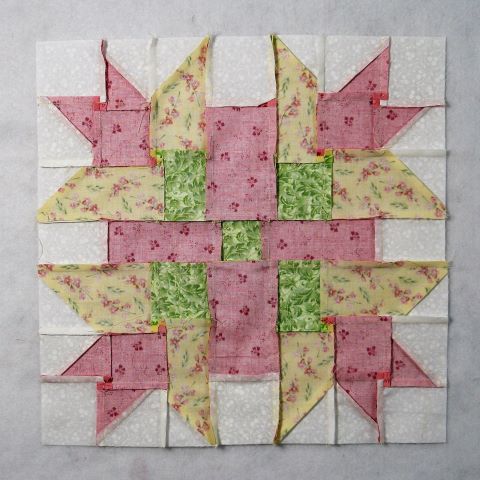
This lovely traditional pieced block is really fun and easy to sew together. Use your favorite colors to create your Summer Blooms! Let’s get sewing!
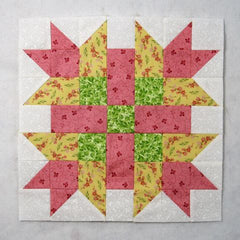
Fabric Requirements for a 14″ Finished Summer Blooms Quilt Block:
- Light/White: 4 – 3″ squares and 16 – 2.5″ squares
- Medium/Yellow: 8 – 2.5″ x 4.5″ rectangles
- Medium/Green: 5 – 2.5″ squares
- Dark/Pink: 4 – 3″ squares, 4 – 2.5″ x 4.5″ rectangles, and 4 – 2.5″ squares

Sewing Instructions:
Corner Units:
Step 1:
Using the Light/White 3″ squares and the Dark/Pink 3″ squares sew together eight Half Square Triangles like the ones in the picture below. Trim/square up to 2.5″ squares. You can find my tutorials on how to make a Half Square Triangle block at https://quiltembroiderypdf.com/how-to-sew-a-basic-half-square-triangle-block and https://quiltembroiderypdf.com/two-easy-methods-for-making-half-square-triangle-quilt-blocks

Step 2:
Lay out two Step 1 Half Square Triangles, one Light/White 2.5″ square, and one Dark/Pink 2.5″ square as shown in the picture below.

Step 3:
Sew the patches into two rows and press the seam allowances away from the Half Square Triangles as shown.

Step 4:
Sew the two rows together and press the seam allowance. I recommend pressing with the tweak/twirl/furl method as shown in the picture below. Repeat Steps 2 through 4 for a total of four units.

Step 5:
Mark a diagonal line from corner to corner on the back of a Light/White 2.5 square and sew it to a Medium/Yellow 2.5″ x 4.5″ rectangle following the marked line (first image). Fold the square along the sewn line, match up the corners and press (second image). Unfold and trim away the excess seam allowance (third image). Refold and you have one unit completed (fourth image). This is basically half of a Flying Geese block.

Step 6:
Now you’ll repeat Step 5 only changing the orientation of the marked line on the back of the Light/White square as shown below.

Step 7:
Repeat Steps 5 and 6 so you have a total of four units of each orientation as shown in the picture below.

Step 8:
Lay out a Step 4 unit, a Step 5 unit, a Step 6 unit, and a Medium/Green 2.5 square as shown.

Step 9:
Sew the units into two rows and press the seam allowances toward the Step 5 and 6 units as shown in the picture below.

Step 10:
Sew the two rows together and press the seam allowance. It doesn’t matter which way you press this seam allowance but you can see in the picture that I used the tweak/twirl/furl method. Repeat for a total of four Corner units.

Two Patch Unit:
Step 11:
Sew a Light/White 2.5″ square to one end of a Dark/Pink 2.5″ x 4.5″ rectangle and press the seam allowance toward the Dark/Pink fabric as shown below. Repeat for a total of four units.

Putting It All Together:
Step 12:
Lay out the Corner units, the Two Patch units, and a Medium/Green 2.5″ square as shown in the picture below. You’ll be sewing them together just like an uneven Nine Patch block.

Step 13:
Sew the units into three rows as shown below.

Step 14:
Press the seam allowances away from the Two Patch units as shown.

Step 15:
Sew the three rows together and you’re done! Well, except for…

Step 16:
the pressing. Press the seam allowances toward the center of the block as shown in the picture below. Now you’re really done!