This Butterfly quilt block is a pieced quilt block that is fairly easy to sew together. Most butterfly blocks are paper pieced or applique, so this one is different! Let’s get started.
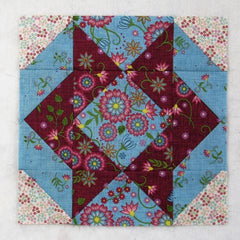
Fabric Requirements for a 12″ Finished Butterfly Quilt Block:
- Light/White Print: 2 – 4″ squares
- Medium/Blue Focal: 1 – 6.5″ square, and 2 – 3.5″ x 6.5″ rectangles
- Medium/Blue: 2 – 4″ squares, and 4 – 3.5″ squares
- Dark/Burgundy: 2 – 3.5″ x 6.5″ rectangles, and 8 – 3.5″ squares

Sewing Directions:
Half Square Triangle Units:
Step 1:
Using the picture below for a reference, mark a diagonal line from corner to corner on the back of the two Light/White Print 4″ squares. Match one up with a Medium/Blue 4″ square and sew 1/4″ on both sides of the marked line. Then cut along the marked line. You can find a detailed tutorial for making Half Square Triangle blocks at https://quiltembroiderypdf.com/how-to-sew-a-basic-half-square-triangle-block and https://quiltembroiderypdf.com/two-easy-methods-for-making-half-square-triangle-quilt-blocks

Step 2:
Now you can open up the Half Square Triangle unit and press the seam allowance toward the Light/White Print fabric. Then trim/square up the unit to 3.5″ square as shown below.

Center Unit:
Step 3:
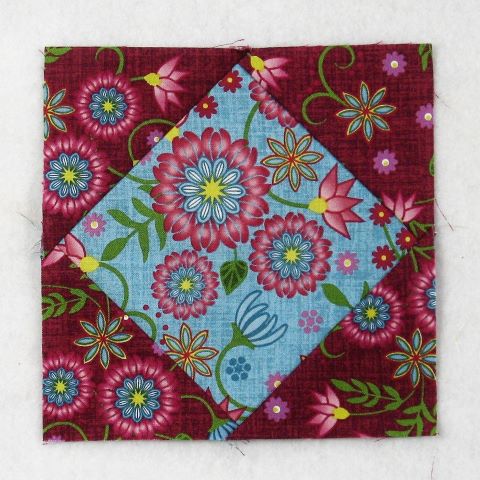
Mark a line on the back of the Dark/Burgundy 3.5″ squares. Set aside four of the squares for later use. Place one of the marked squares in a corner of the Medium/Blue Focal 6.5″ square and sew very close to the marked line as shown in the picture below. Then match up the corners of the Dark/Burgundy squares and press. This Center unit is basically a Square in a Square block and you can find a detailed tutorial for it at https://quiltembroiderypdf.com/how-to-sew-a-basic-square-in-a-square-block.

Step 4:
Now unfold the Dark/Burgundy square, trim away the excess seam allowance and refold as shown below.

Step 5:
Repeat Steps 3 and 4 for all four corners of the Medium/Blue Focal square to complete the unit as shown in the picture below.
Flying Geese Units:
Step 6:
Using the 2 Medium/Focal Print 3.5″ x 6.5″ rectangles and four Dark/Burgundy 3.5″ squares, sew together two Flying Geese units as shown in the picture below. You can find my no-trim method for making Flying Geese blocks at https://quiltembroiderypdf.com/how-to-sew-a-basic-flying-geese-block

Step 7:
Repeat Step 6 using the Dark/Burgundy 3.5″ x 6.5″ rectangles and the Medium/Blue 3.5″ squares as shown below.

Putting It All Together:
Step 8:
Now you can lay out the Half Square Triangle units, the Center unit, and the Flying Geese units as shown in the picture below.

Step 9:
From here the Butterfly block goes together like an uneven Nine Patch block. First, sew the units into three rows as shown in the picture below.

Step 10:
Press the seam allowances toward the Flying Geese units as shown.

Step 11:
Then sew the three rows together and…

Step 12:
Press the seam allowances away from the center of the block. You’re done!

Layout Options:
Here’s a plain 4 x 4 layout. Very geometric looking!

And with sashing and cornerstones added:

Here’s an on point layout. It always amazes me how different on point quilts look!

In this example, I changed up the coloring of the block:

And added sashing and cornerstones:

In this example, I rotated every other block. I like this one!
