As Valentine’s Day is just around the corner, here’s another scrappy Heart quilt block. This block is easy and goes together fast. I’m also including fabric requirements for 6″, 8″, 10″ and 12″ blocks!
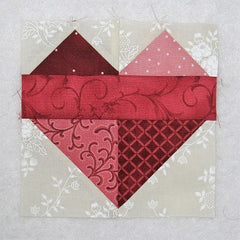
Fabric Requirements:
6″ Finished Scrappy Heart Quilt Block:
- Light/Cream: 2 – 4″ squares, and 2 – 2″ squares
- Assorted Reds/Pinks: 2 – 4″ squares, 2 – 2″ x 3.5″ rectangles, and 1 – 2″ x 6.5″ rectangle
8″ Finished Scrappy Heart Quilt Block:
- Light/Cream: 2 – 5″ squares, and 2 – 2.5″ squares
- Assorted Reds/Pinks: 2 – 5″ squares, 2 – 2.5″ x 4.5″ rectangles, and 1 – 2.5″ x 8.5″ rectangle
10″ Finished Scrappy Heart Quilt Block:
- Light/Cream: 2 – 6″ squares, and 2 – 3″ squares
- Assorted Reds/Pinks: 2 – 6″ squares, 2 – 3″ x 5.5″ rectangles, and 1 – 3″ x 10.5″ rectangle
12″ Finished Scrappy Heart Quilt Block:
- Light/Cream: 2 – 7″ squares, and 2 – 3.5″ squares
- Assorted Reds/Pinks: 2 – 7″ squares, 2 – 3.5″ x 6.5″ rectangles, and 1 – 3.5″ x 12.5″ rectangle

Sewing Directions:
Half Square Triangle Units:
Step 1:
Note: The following directions are for a 6″ finished block.
Using the two Light/Cream 4″ squares and two Assorted Red/Pink 4″ squares, sew together four Half Square Triangle units (two will be extras to use on another block). You can find my tutorial for making a basic Half Square Triangle (HST) block at https://quiltembroiderypdf.com/how-to-sew-a-basic-half-square-triangle-block.

Step 2:
Press the seam allowance on one HST toward the Red/Pink fabric and one HST toward the Light/Cream fabric as shown in the picture below. Trim the HSTs to 3.5″ square.

Flying Geese Units:
Step 3:
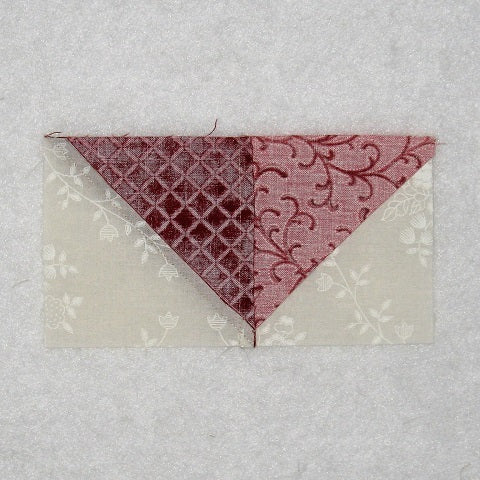
Now you can make the Flying Geese units using the two Red/Pink 2″ x 3.5″ rectangles and the four Light/Cream 2″ squares like the ones shown below. You will find my no-trim method for making Flying Geese blocks at https://quiltembroiderypdf.com/how-to-sew-a-basic-flying-geese-block.

Step 4:
At this point, I like to lay out all the units to make sure I get a pleasing arrangement of colors.

Sewing the Rows:
Step 5:
Sew the two Half Square Triangle units together as shown in the picture below.

Step 6:
Press the seam allowance. It doesn’t really matter which way the seam allowance is pressed – you can even press it open if you wish.
Step 7:
Sew the two Flying Geese units together as shown below.

Step 8:
And press the seam allowance. Once again, it doesn’t matter which direction you press the seam allowance.

Putting It All Together:
Step 9:
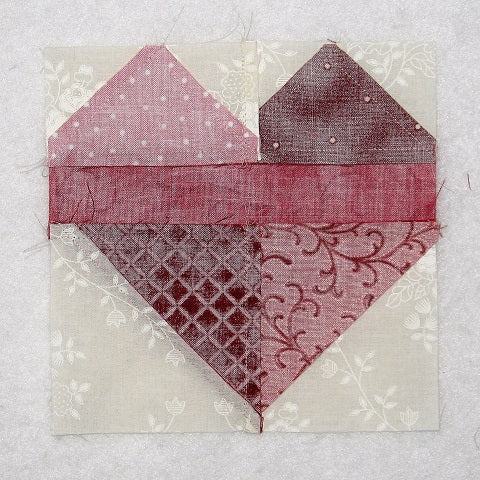
Lay out the two rows you’ve made plus the Red/Pink 2″ x 6.5″ rectangle as shown in the picture below.

Step 10:
Sew the rows together…

Step 11:
Press the seam allowances towards the Red/Pink 2″ x 6.5″ rectangle. All finished!
Layout Options:
Here’s a 5 x 5 layout with alternating plain blocks. Sweet!

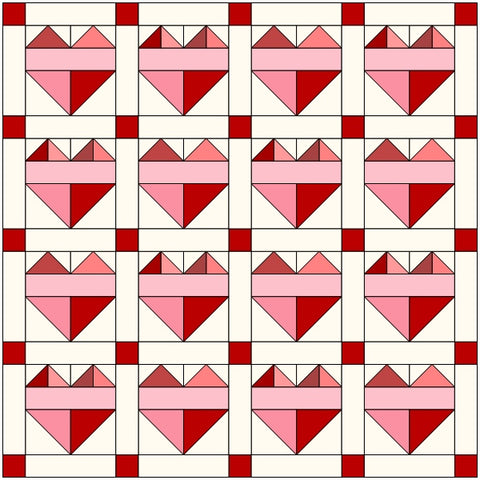
This is a cute layout too with sashing and cornerstones.
This is an on-point layout with a center square in a square block and borders.

And to be a bit different, I’ve rotated the blocks around the center and added sashing and cornerstones.
