Awhile back I did a tutorial for the traditional Shoofly quilt block and a variation that I call the Disappearing Shoofly block. Here’s a link to that tutorial: https://quiltembroiderypdf.com/free-pattern-shoofly-quilt-block-variation I had quite a few requests to see a whole quilt made with this variation (and I wanted to make a quilt with the block too) so here it is!

Harry had to check out what Mom was doing and I think he approves of it too! The wind is always blowing around here so I used some extra clothes pins to try to keep the quilt under control in case you’re wondering what’s on the bottom of the quilt.
(Update: I have a downloadable PDF pattern in my Etsy shop for this quilt. It is available for purchase at $12. Here’s the link: Shoofly Switch PDF Pattern)
Fabric Requirements for a 53″ x 61.5″ Finished Disappearing Shoofly Quilt:
Each block finishes at 8.5″ and I made this quilt with 30 blocks.
- Light/White: 2 yards
- Print 1: 1/3 yard
- Print 2: 1/3 yard
- Center Print: 1/3 yard
- Border 1: 1/4 yard
- Border 2: 3/4 yard
- Binding: 1/2 yard
- Backing: 3.5 yards
Cutting Directions:
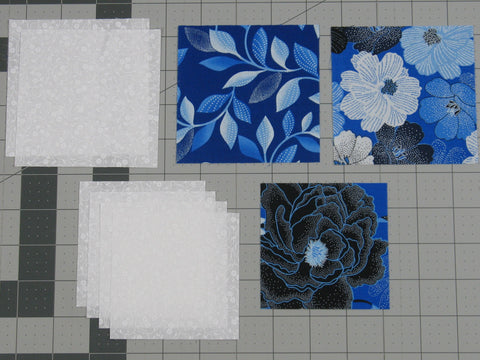
- Light/White: 60 – 4″ squares, and 120 – 3.5″ squares
- Print 1: 30 – 4″ squares
- Print 2: 30 – 4″ squares
- Center Print: 30 – 3.5″ squares
- First Border: 5 – 1.75″ x width of fabric (WOF) strips
- Second Border: 6 – 4.5″ x WOF strips
- Binding: 6 – 2.5″ x WOF strips
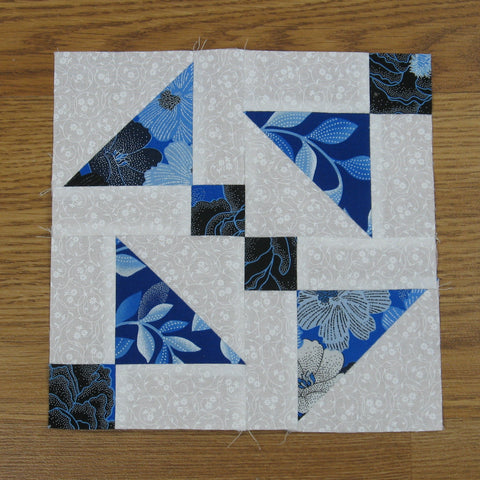
So this picture below X 30!
Sewing Directions:
Disappearing Shoofly Quilt Block:
Step 1:
Make 30 of the Disappearing Shoofly blocks using the Light/White, Print 1, Print 2, and Center Print fabrics.
Quilt Center:
Step 2:
Sew the blocks together in 6 rows of 5 blocks each. Press the seam allowances in rows 1, 3 and 5 in one direction and rows 2, 4 and 6 in the opposite direction.
Borders:
General Directions:
Measure the length of the quilt top in three places & take the average of these measurements to cut the length of your strips for the side borders. Sew strips to the right and left sides of the quilt top. Press seam allowances outward. Measure the width of the quilt top in three places & take the average of these measurements to cut the length of your strips for the side borders. Sew strips to the top and bottom sides of the quilt top. Press seam allowances outward.
First Border:
Step 3:
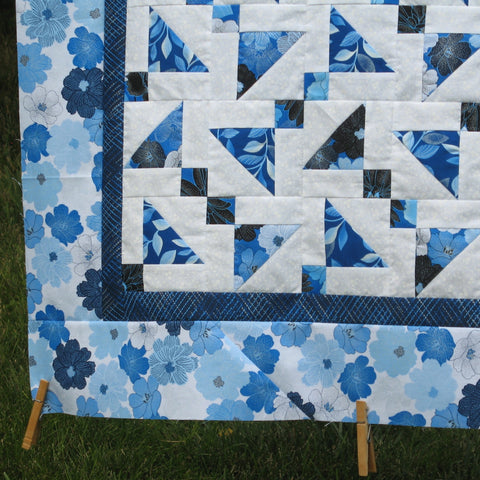
I cut the strips for the First Border at 1.75″ so the border would finish at 1.25″. That is the size of the small squares in the block and contributes continuity to the finished quilt. (Or at least I think it does!)
Sew the strips together, end to end (I sew them together with a diagonal seam), cut to the length required, and apply to the quilt center.
Second Border:
Step 4:
Sew the strips together, end to end, cut to the required length, and sew to the quilt center. You can see a closeup of the borders in the picture below.
Finishing:
Quilting:
So now comes the dreaded “quilt as desired” part of the pattern! I will probably quilt this Disappearing Shoofly quilt with an allover floral that mimics the flowers in the border. Another option could be an allover design in the quilt center and then separate designs in the borders.
Binding:
Sew the 6 Binding strips together end to end with diagonal seams. Trim seam allowances and press open. Fold strip in half length-wise and press. Apply binding to the outer edge of quilt. Enjoy!