Today let’s look at a simple version of the traditional Dolly Madison’s Star quilt block. This version is easy to sew together and looks great! The traditional block is very difficult to sew together – lots of triangles inside the star points – so we’re going to use the simplified version. Let’s get started!
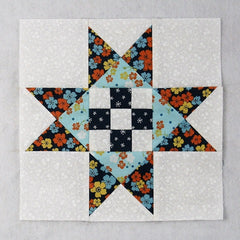
Fabric Requirements for a 9″ Finished Dolly Madison Star Quilt Block:
- Light/White: 1 – 4.5″ square, 4 – 3.5″ square, and 5 – 1.5″ squares
- Medium/Blue: 1 – 4.5″ square
- Dark 1/Navy: 4 – 1.5″ squares
- Dark 2/Navy Floral: 2 – 4.5″ squares

Sewing Directions:
Hourglass Units:
Step 1:
Using the Light/White 4.5″ square, the Medium/Blue 4.5″ square and the two Dark 2/Navy Floral 4.5″ squares sew together four Hourglass units as shown in the picture below. Trim the units to 3.5″ square. You will find my tutorial for making these three-color hourglass units at https://quiltembroiderypdf.com/how-to-sew-a-basic-hourglass-or-quarter-square-triangle-block

Center Unit:
Step 2:
Sew together a Nine Patch unit using the Light/White 1.5″ squares and the Dark 1/Navy 1.5″ squares like the one below. You can find a tutorial about different ways to make Nine Patch blocks at https://quiltembroiderypdf.com/how-to-sew-a-basic-nine-patch-quilt-block

Putting It All Together:
Step 3:
Lay out the Hourglass units, the Center unit, and the four Light/White 3.5″ squares as shown in the picture below.

Step 4:
From here the Dolly Madison goes together like a basic Nine Patch block. Sew the patches together into three rows as shown below.

Step 5:
Press the seam allowances away from the Hourglass units as you can see in the picture below.

Step 6:
Now you can sew the three rows together to complete the block. Easy peasy!

Step 7:
All that’s left is to press the seam allowances toward the center. You’re done!

Layout Ideas:


