Here’s an easy quilt block that has a lot of color placement interpretations. Plus it makes a very interesting quilt! I have some layout examples at the end (including a scrappy one). Let’s jump in!
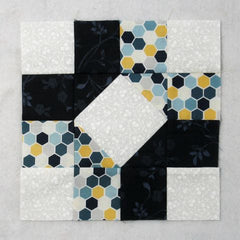
Update: I now have a PDF quilt pattern in my Etsy shop that uses this block. Check it out by clicking: Circle Illusion
Fabric Requirements for an 8″ Finished Mr. Roosevelt’s Necktie Quilt Block:
- Light/White: 1 – 4.5″ square, and 4 – 2.5″ squares
- Medium/Print: 6 – 2.5″ squares
- Dark/Navy: 6 – 2.5″ squares

Sewing Directions:
Square in a Square Unit:
Step 1:
Using the Light/White 4.5″ square, two of the Medium/Hexie 2.5″ squares, and two Dark/Navy 2.5″ squares sew together a Square in a Square unit like the one shown below. You can find my tutorial for making a basic Square in a Square block at https://quiltembroiderypdf.com/how-to-sew-a-basic-square-in-a-square-block

Two Patch Units:
Step 2:
Match up one Medium/Hexie 2.5″ square with one Dark/Navy 2.5″ square and sew together. Press seam allowance toward the Dark/Navy fabric as shown in the picture below. Repeat for a total of 4 Two Patch units.

Putting It All Together:
Step 3:
Lay out the center Square in a Square unit, the Two Patch units, and the four Light/White 2.5″ squares as shown in the picture below.

Step 4:
Sew the patches together into three rows as shown below.

Step 5:
Press the seam allowances toward the Two Patch units as shown in the picture below.

Step 6:
Sew the rows together to complete the block! Easy peasy!

Step 7:
Press the seam allowances away from the center of the block as shown in the picture below. You’re done!

Layout Examples:
Here’s an example of the block laid out in a typical 4 x 4 manner.

Here’s my favorite. I rotated every other block to get this design.

In this example, the Light/White 4.5″ square was substituted with a purple fabric. I like this too.

Of course I had to see what it looked like as a scrappy quilt – even better!
