Today let’s learn how to sew the Crow’s Nest quilt block. This charming block is beginner-friendly as it is made entirely of Half Square Triangle, rectangles and one square – super quick to create. Let’s get started!
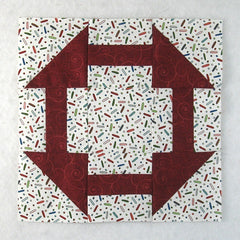
Fabric Requirements for a 9″ Finished Crow’s Nest Quilt Block:
- Light: 2 – 4″ squares, 1 – 3.5″ square, and 8 – 1.5″ x 3.5″ rectangles
- Dark: 2 – 4″ squares, and 4 – 1.5″ x 3.5″ rectangles

Sewing Directions:
Half Square Triangle Units:
Step 1:
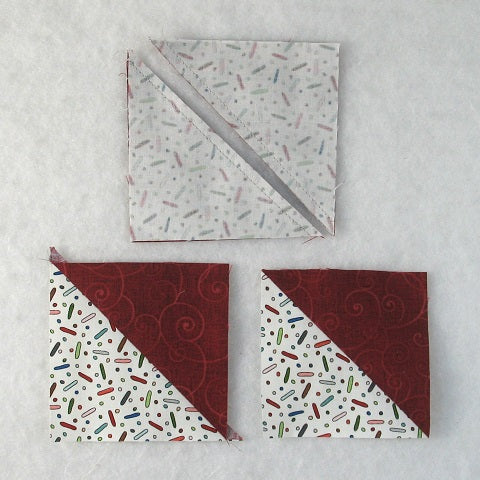
Using a Light 4″ square and a Dark 4″ square, make two Half Square Triangle (HST) units. Press the seam allowance toward the Dark fabric and trim the units to 3.5″ square as shown by the bottom right HST in the picture below. You can find my detailed tutorial for making a basic Half Square Triangle block at https://quiltembroiderypdf.com/how-to-sew-a-basic-half-square-triangle-block.
Step 2:
Repeat Step 1 for a total of four Light/Dark Half Square Triangle units.

Roman Stripe Units:
Step 3:
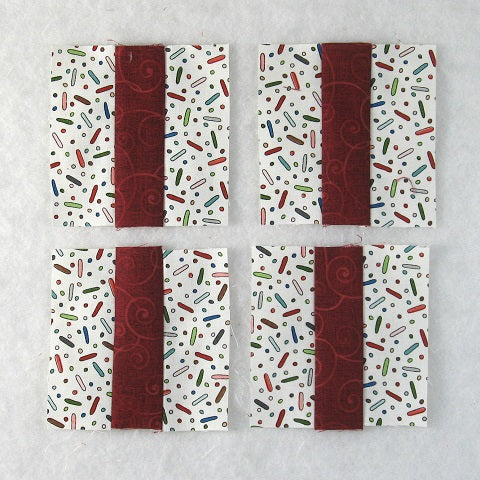
Lay out and sew together two Light 1.5″ x 3.5″ rectangles and one Dark 1.5″ x 3.5″ rectangle as shown in the picture below. Press the seam allowances toward the Dark fabric.
You can find a detailed tutorial for the Roman Stripe block at https://quiltembroiderypdf.com/free-pattern-for-a-basic-roman-stripe-block

Step 4:
Repeat Step 3 for a total of four Roman Stripe units.
Putting It All Together:
Step 5:
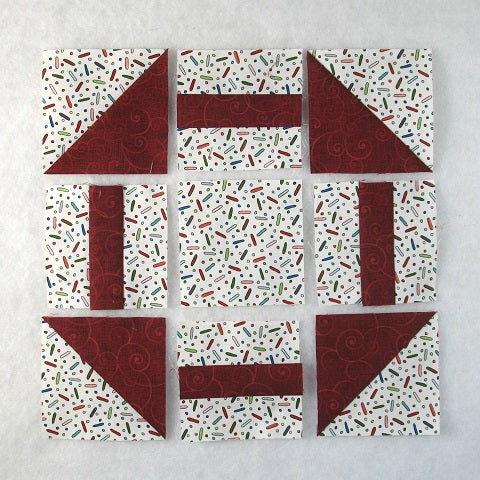
Lay out the Step 2 Half Square Triangle units, the Step 4 Roman Stripe units, and the Light 3.5″ square as shown in the picture below. From here the block goes together like a basic Nine Patch block.
Step 6:
Sew the units into three rows as shown below.
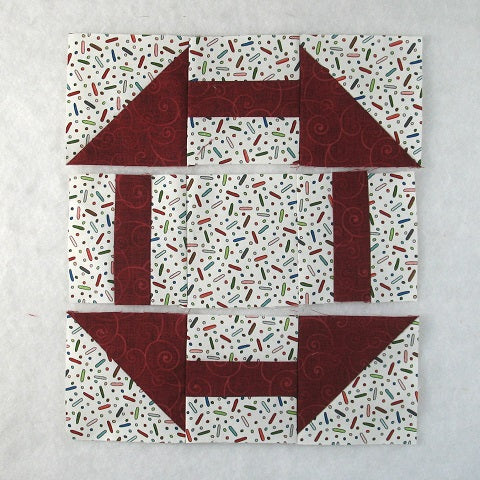
Step 7:
Press the seam allowances toward the Roman Stripe units as shown in the picture below.
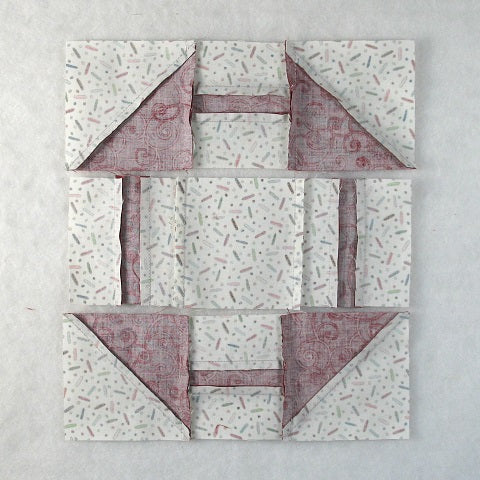
Step 8:
All that’s left is to sew the three rows together and…
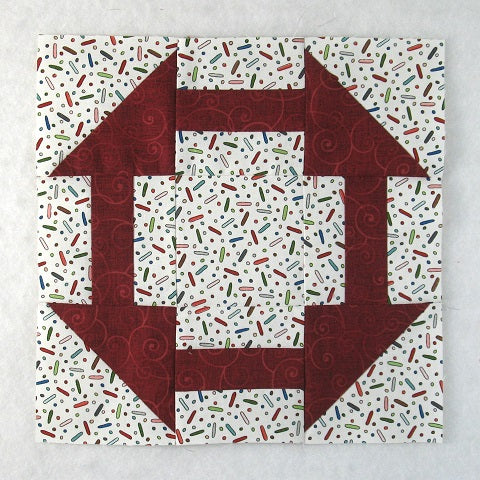
Step 9:
Press the seam allowances away from the center of the block. That was fast!
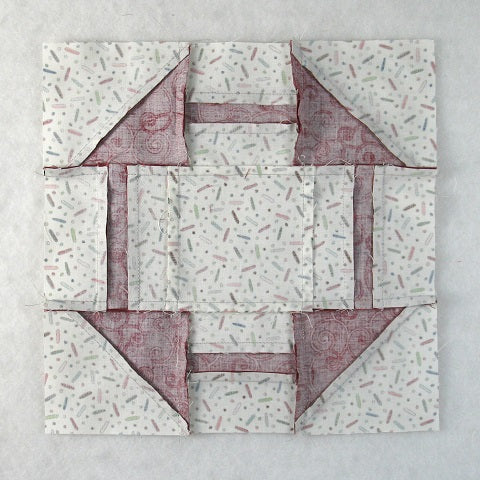
Layout Ideas:
Here’s the basic 4 x 4 layout.
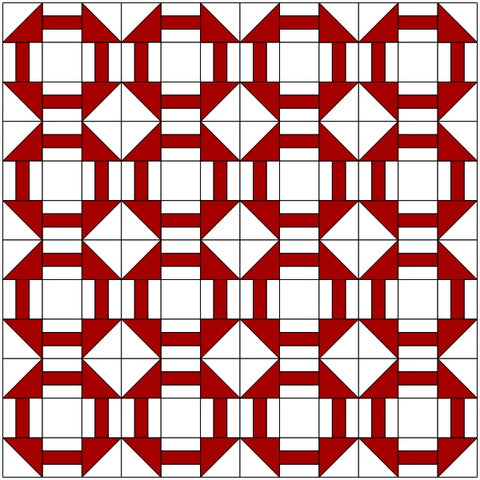
And here’s the same layout but with sashing and cornerstones added and using two dark fabrics. I like this better.

For this example I’ve used a scrappy block and alternated with a large Hourglass block.
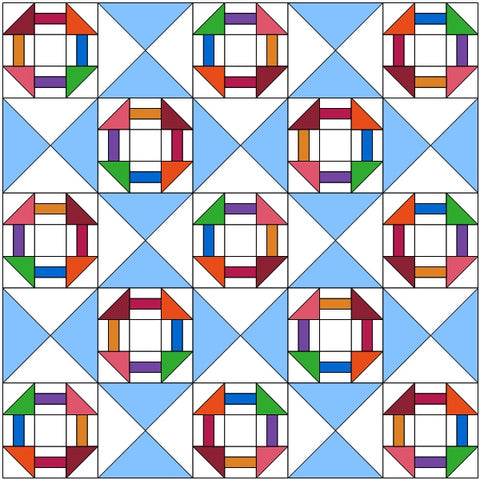
This is another alternating version using a simple chain block.

This on-point version is what happens when you use black instead of a light and add in black sashing and cornerstones. What a difference!
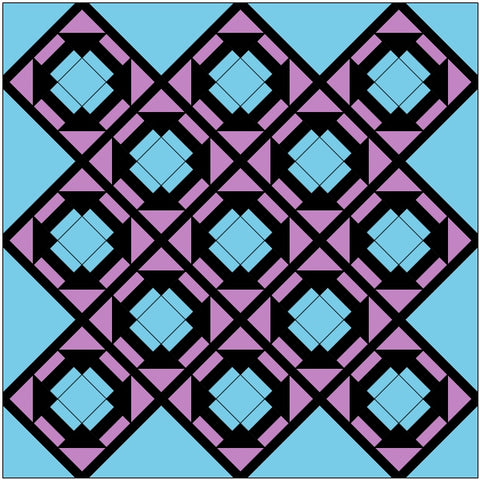
Here’s another on-point layout using an alternating chain block. I do think this is my favorite version.
