Valentine’s Day is just around the corner, and there’s no better way to celebrate than with a handmade touch of love! This Scrappy Nine Patch Heart Quilt Block is the perfect project to showcase your red and pink fabric scraps while adding a pop of charm to your sewing.
Featuring a sweet nine-patch center framed by a heart design and built-in sashing, this block is quick to make, beginner-friendly, and bursting with Valentine’s Day vibes. Whether you’re creating a full quilt, a festive table runner, or a heartfelt gift, this block will stitch up in no time and make your holiday extra special!
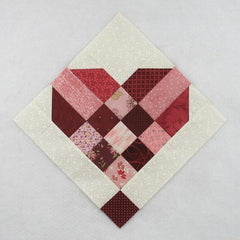
Fabric Requirements for a 12″ Finished Nine Patch Heart Quilt Block:
- Light/Cream: 2 – 2.5″ x 10.5″ rectangles, 1 – 4.5″ square, and 4 – 2.5″ squares
- Assorted Pinks: 2 – 2.5″ x 4.5″ rectangles, and 5 – 2.5″ squares
- Assorted Reds: 4 – 2.5″ x 4.5″ rectangles, and 5 – 2.5″ squares

I now have this block as a PDF for sale in my Etsy shop. This is totally optional. Click the button below to learn more:

Sewing Directions:
Nine Patch Unit:
Step 1:
Lay out the five Pink 2.5″ squares and four Red 2.5″ squares as shown in the picture below. This unit goes together just like a typical Nine Patch block.

Step 2:
Sew the squares into three rows as shown below. Press the seam allowances toward the Red squares.

Step 3:
Sew the three rows together and press the seam allowances toward the center of the unit.

Half Flying Geese Units:
Step 4:
These units are created simply by snowballing a corner of a Red rectangle with a Cream square – or doing only half of a Flying Geese unit.
- Mark a diagonal line from corner to corner on the back of a Cream 2.5″ square.
- Sew it to the upper left corner of a Red 2.5″ x 4.5″ rectangle along the marked line as shown in the left image below.
- Match up the corners of the Cream square and press as shown in the right image in the picture below.

Step 5:
- Open up the Cream square and trim the seam allowance as shown in the left image.
- Refold to complete the unit.
- Repeat for a total of two units.

Step 6:
Repeat Steps 4 and 5 with the two remaining Cream 2.5″ squares and Red 2.5″ x 4.5″ rectangles only changing the orientation of the Cream square to the upper right corner of the rectangle as shown below.

Step 7:
Here’s a picture of all four units.

Strip Units:
Step 8:
Lay out a Step 5 and Step 6 unit with a Pink 2.5″ x 4.5″ rectangle as shown below.
